October 26th, 2020Glen, About The House
Our house started out as three small office buildings at the Ophir Gold Mine in Doctor’s Gully, was hauled up to the present site under horsepower and then reassembled early last century. More recent extensions and renovations resulted in what we now call home.
We moved in near the end of the previous decade-long nation-wide drought, to a garden ringed with a collection of beautiful, mostly centenarian trees and a broad expanse of parched grass. A perfect blank canvas and a great headstart for a new garden.
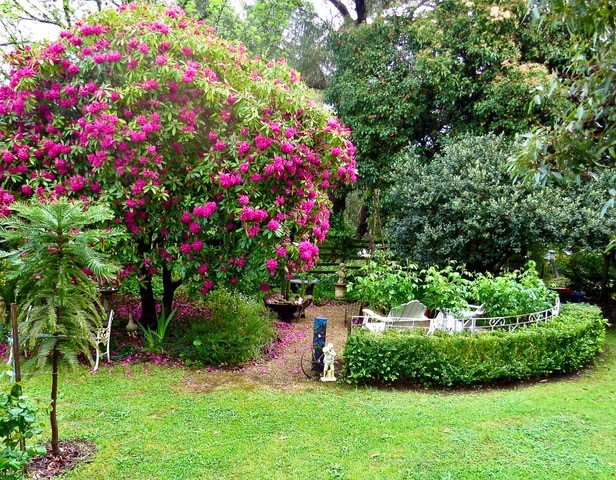
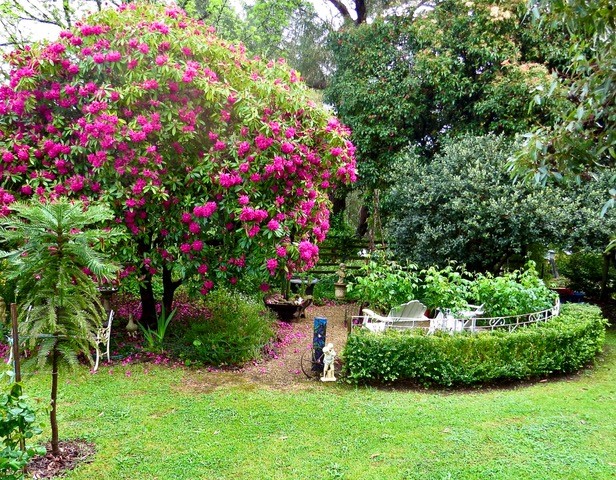
The photograph, below, features one of our beautiful rhododendrons. The ragged box hedge is a survivor of its first clipping and my first go with a powered hedge trimmer. Also at far left of the picture is the ‘main prize’, from prehistoric times, our Wollemi pine.
Survivors from our distant past
Around the same time as the Wollemi pine was established, 150 million years ago, is another of the few remaining links, the ferns, existing almost unchanged since forming the basic vegetation of primeval times. Botanically ferns differ from higher forms of plant life in that they do not flower but reproduce themselves from dust-like spores which form on the backs of their fronds in spore cases somewhat resembling scale insects, and are often mistaken for them. Pictured above is one of my three ancient native cycad ferns.
In spite of their delicate, even fragile appearance, ferns will grow quite readily if the conditions suit them. These conditions are moist air, damp porous soil and plenty of shade.

Remembering that most ferns originate from the banks of forest streams or the floor of rain forests, find them a cool spot under established trees and shrubs, or a dark corner of a shadehouse or enclosed porch.
Ferns do well in poorly lit rooms unsuited to other light-loving plants. They need little feeding especially if the potting mixture contains a liberal amount of well-rotted cow manure.
Ferns will usually grow quite readily from spores by following these steps. Collect the spores by holding a sheet of white paper under the spore-laden fronds and tap them lightly to dislodge the ripe ones. Dust them onto a mixture of equal parts of finely broken-up peat moss and coarse sand and put this in a pot.
Place the pot in a humid position in a glass frame or deep box and cover with a sheet of glass. To keep things humid, place a shallow bowl of water in with the pots.
Alternatively you may like to create a mini glasshouse from an opaque-sided, lidded plastic trunk. Drill four or five 15mm holes in the corners of the lid for air and several larger ones in the bottom for drainage. Keep the container in the shade at all times. (Obviously this would also be perfect for propagating other seedlings and cuttings.)
After two or three weeks you should see pinhead-sized green dewdrops on the surface of the soil. From these, small fronds should emerge after another two or three weeks. Once the plantlets are about 2-3 centimetres high they can be carefully lifted from the pot using tweezers and put into larger containers of the same mixture, spacing them 4-5cm apart.
The little ferns can be potted into individual containers once they reach 5-7cm high.
The potting mix should be friable, crumbly and slightly acidic. Mix it from equal parts of coarse sand, well-rotted compost or peat moss and good garden loam.
It isn’t necessary to repot them too often. Ferns prefer to be a little pot-bound. They also need minimal care: mostly cutting off any old or dead fronds and keeping any pests at bay.
Got a gardening question? Ask Glen.
Email glenzgarden@gmail.com


